How To Install License Plate Frame In 3 Steps
A license plate frame can help protect the edges of the license plate from getting bent or damaged. It can also make it more difficult for someone to steal or tamper with the license plate. You can choose a frame that matches your car's color or style. If you're looking to make a statement, you can find a frame with a custom design. A license plate frame is a simple way to give your car some extra personality. Also, adding this accessory to your vehicle is easy and it hardly takes five minutes to install a license plate frame on your car or motorcycle.
There are several different ways to install a license plate frame, depending on the make and model of your vehicle. The most common way to install a frame is by screwing it into place using the existing screws/hardware. However, some frames come with adhesive strips that can be used to attach the frame to your license plate. If your vehicle has a plastic bumper, you may be able to install the frame without any hardware at all. Simply adhere the strips to the back of the frame and press it firmly into place.
When choosing a license plate frame, it is important to take into account the mounting style of your vehicle. Some frames are designed to be mounted on top of the license plate, while others fit around the edges. The type of frame you choose will depend on the look you are going for and the amount of space you have available.
No matter what type of license plate frame you choose, be sure to read the instructions carefully before installation. This will help ensure that you install the frame correctly and avoid damaging your vehicle or frame itself.
The following tools and parts are required:
- Screwdriver (phillips or flat)
- New replacement or existing hardware
- License Plate Frame purchased from BestLicensePlateFrames.com
Steps - How to install license plate frame
Step 1: Remove License Plate from the vehicle
The first step in installing a new license plate frame is using the correct screwdriver to remove the current license plate along with the old license plate frame (in case you have it).
Step 2: Inspect the mounting area
Before attaching the license plate frame, clean the surface area of the license plate. This is required to ensure that the surface is ready for a proper installation and free from dirt and debris.
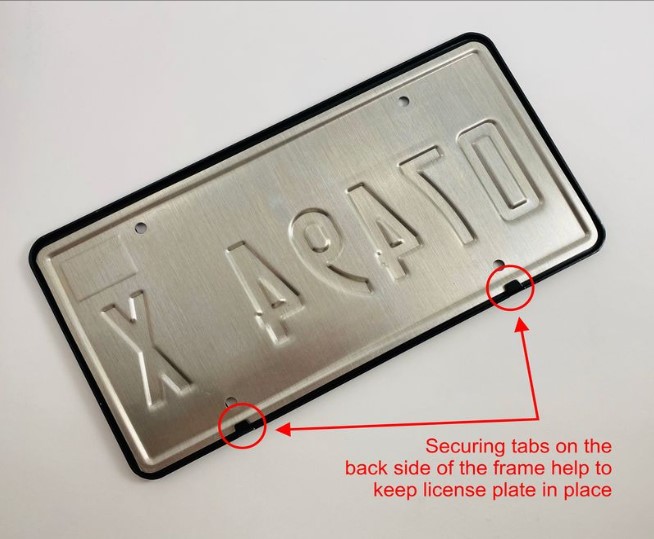
Place the license plate inside of the license plate frame to ensure proper alignment and positioning. Make sure it is centered and straight.

Step 3: Mount the license plate along with the license plate frame on your vehicle
Once the license plate frame is placed inside of the license frame, you can mount them on your vehicle easily by using a screwdriver and existing or new hardware.
This entire process shouldn't take you more than 5 minutes of your time.
Conclusion
Whenever you wash your vehicle or perform routine maintenance, inspect the license plate and frame to ensure they are in good condition.
These steps are easy to follow regardless of your skill level in frame installation. Knowing how to install a license plate frame, for whatever reason, is always handy. With just a few tools, you can remove your old license plate and replace it with your new one in a matter of minutes. The instructions above will help you install a new license plate.
Buy Custom Car & Motorcycle License Plate Frames
Adding a custom license plate frame that matches your vehicle will make it stand out on the road.
Our customized license plate frames are available in various sizes, forms, designs, subjects, constructions, and installation options, making us the industry's largest custom license plate frame manufacturer.
We offer a range of license plate frames without hidden charges, so you can choose your favorite frame, add your wording, preview the finished product, and place your order in minutes.

